Project at a glance
Stopping a roof-level leak by weathering the parapet wall itself
The homeowner was experiencing water ingress inside the property. Inspection showed that the water was not simply passing through a roof covering: it was running down the parapet, penetrating through the wall construction and finding its way into the house. The repair therefore had to protect the exposed top of the wall and interrupt that water path.
Parapet leaks can be misleading because the point where moisture becomes visible internally may be some distance from the point where rain first enters. Correct diagnosis matters before any new flashing or capping is specified.
Location
Kensington, London W8
Property
Private residential home
Problem
Water ingress through the parapet wall
Repair
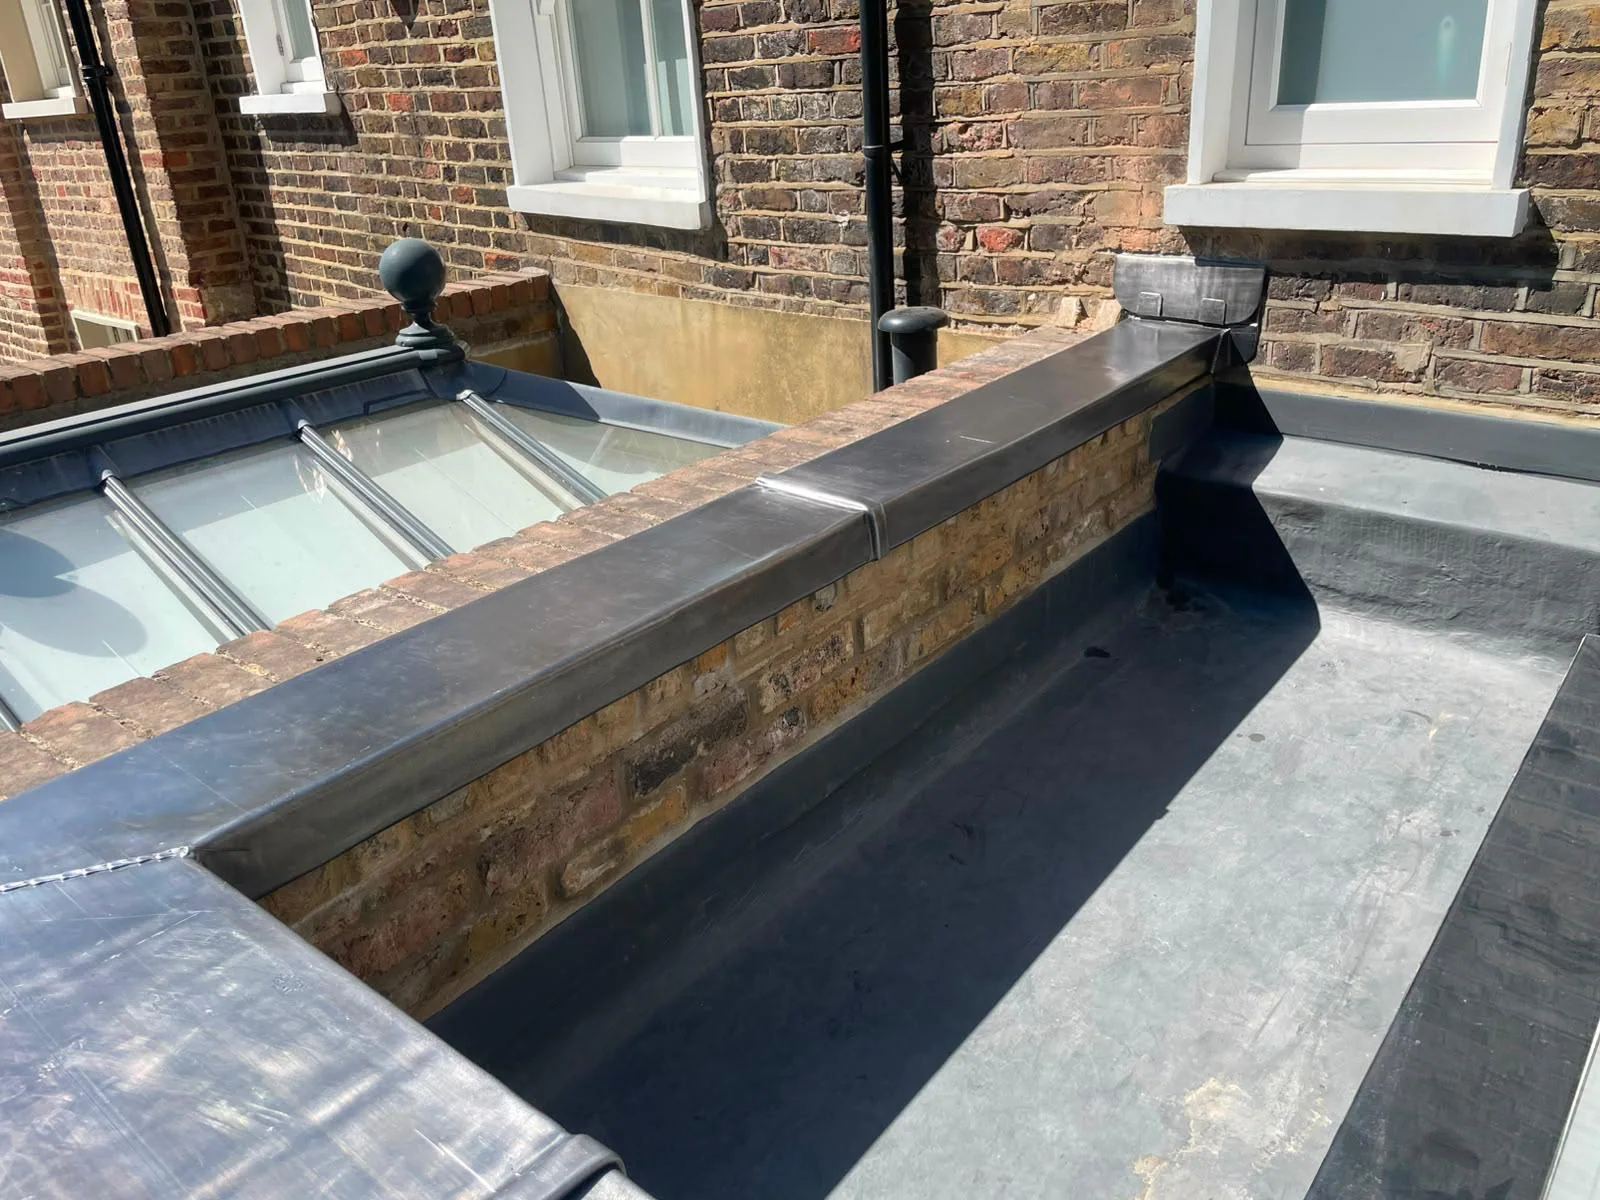
New lead-sheet parapet capping
Lead specification
Code 5 rolled lead sheet
Jointing
Lead-welded joints
Purpose
Weather the exposed wall head
Outcome
Leak resolved
The leak
Water was tracking through the parapet before appearing inside the house
At first glance, a leak at roof level can appear to be a problem with tiles, slate, flat roofing or a nearby flashing. On this Kensington property, the investigation led to a different source: rainwater was reaching the exposed parapet, travelling down through the wall and entering the building.
That distinction changed the repair. Treating the internal staining or sealing a nearby roof joint would not have addressed the route the water was actually taking. The top of the parapet needed a reliable weathering layer that would stop rain reaching the vulnerable masonry below.
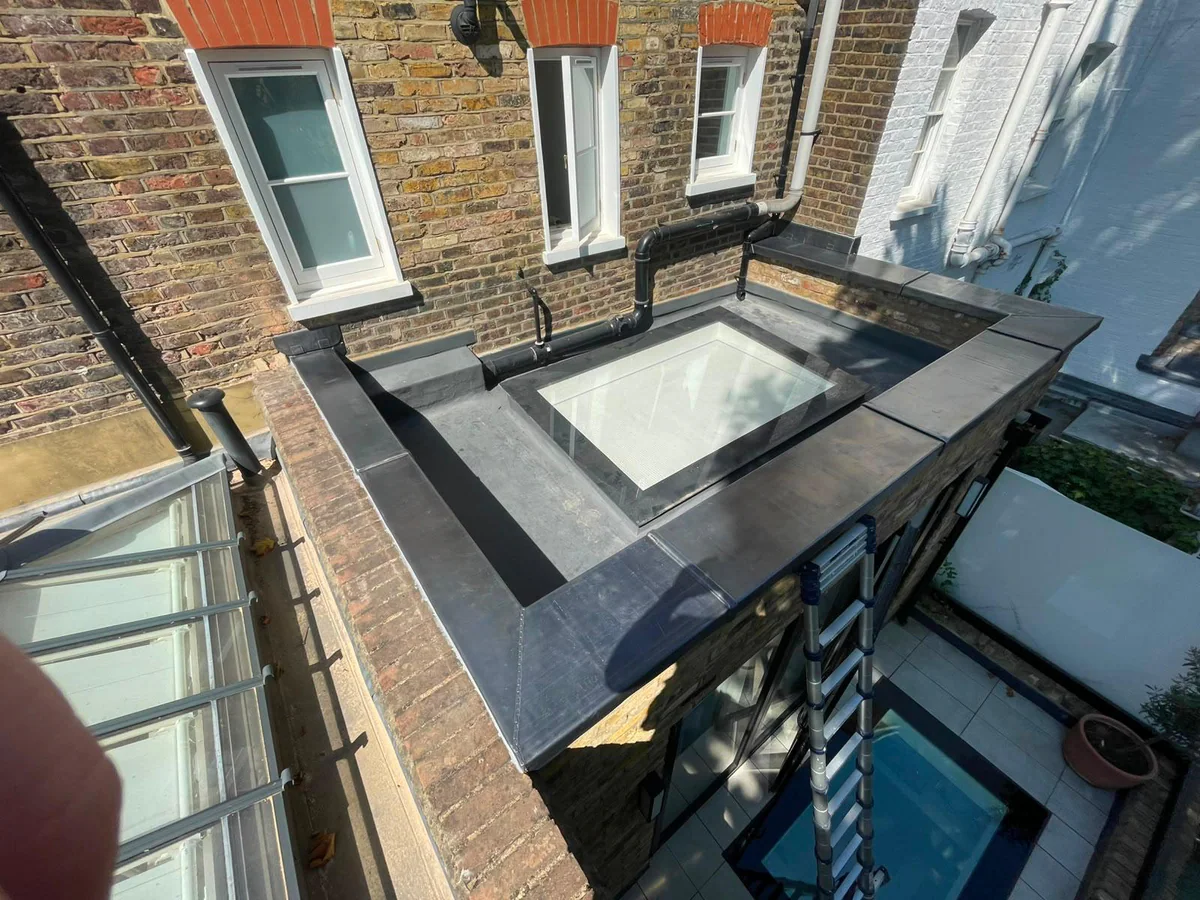
Once the source had been identified, ER Group specified a formed lead-sheet capping to cover the parapet wall head and shed water away from the masonry before it could penetrate the wall.
Why parapets leak
The top of a parapet is one of the most exposed parts of the roofline
A parapet projects above the adjoining roof and is exposed to rainfall from above as well as wind-driven rain across its faces. If the wall head, coping joints or weathering detail allow water in, moisture can travel through the masonry and emerge inside the property some distance away.
01 · Exposed wall head
Horizontal surfaces receive direct rainfall
Unlike a vertical wall face, the upper surface of a parapet receives rain directly. Small defects in the coping, joints or covering can therefore admit a significant amount of water over repeated wet weather.
02 · Wind-driven rain
Water can be forced into joints from several directions
At roof level, exposed masonry is affected by wind as well as gravity. Rain can be driven against the sides and upper joints of a parapet, increasing the importance of a continuous weathering detail.
03 · Hidden water paths
The internal damp mark may not identify the entry point
Once water enters masonry it can track along joints, interfaces and construction layers before becoming visible indoors. The leak therefore has to be traced through the building rather than diagnosed from the internal stain alone.
04 · Connected details
Cappings, flashings and adjoining roof areas must work together
The parapet cannot be considered in isolation from the roof beside it. The wall head, capping, upstands and adjoining weathering details need to direct water away without creating another weak junction.
Diagnosis before repair
Finding the water-entry route before choosing the lead detail
Specialist leadwork is most effective when it is designed around a confirmed defect. For a parapet leak, that means looking beyond the obvious wet area and checking how the wall head, masonry joints, existing coverings and adjoining roof details are controlling rainwater.
On this project, the route was clear enough to establish that the water was passing through the parapet construction itself. The repair therefore concentrated on preventing rain from reaching the exposed wall head, rather than adding another isolated flashing elsewhere on the roof.
That diagnosis is what made a lead capping the appropriate response: the new sheet could act as a separate weathering layer over the parapet and throw water clear before it had the opportunity to enter the masonry.
Code 5 lead capping
A robust rolled-lead covering formed over the parapet wall
ER Group used Code 5 rolled lead sheet for the new capping. Under the BS EN 12588 coding system, Code 5 lead is approximately 2.24 mm thick. That provides a substantial sheet for formed external weathering while retaining the malleability that allows lead to be dressed accurately to the construction beneath.
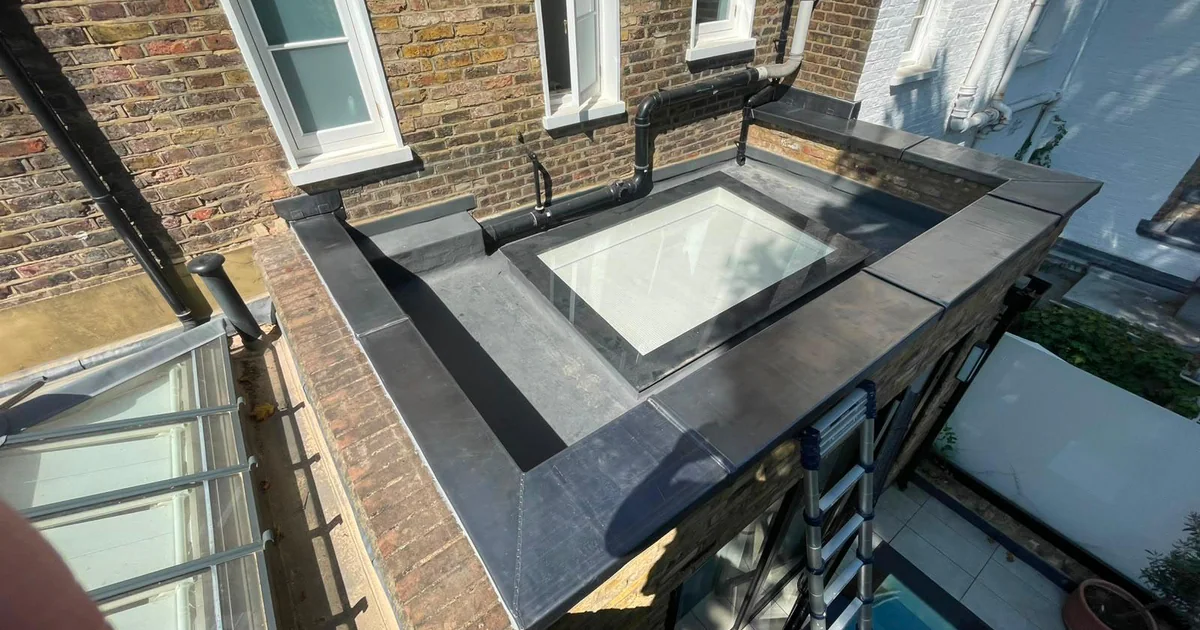
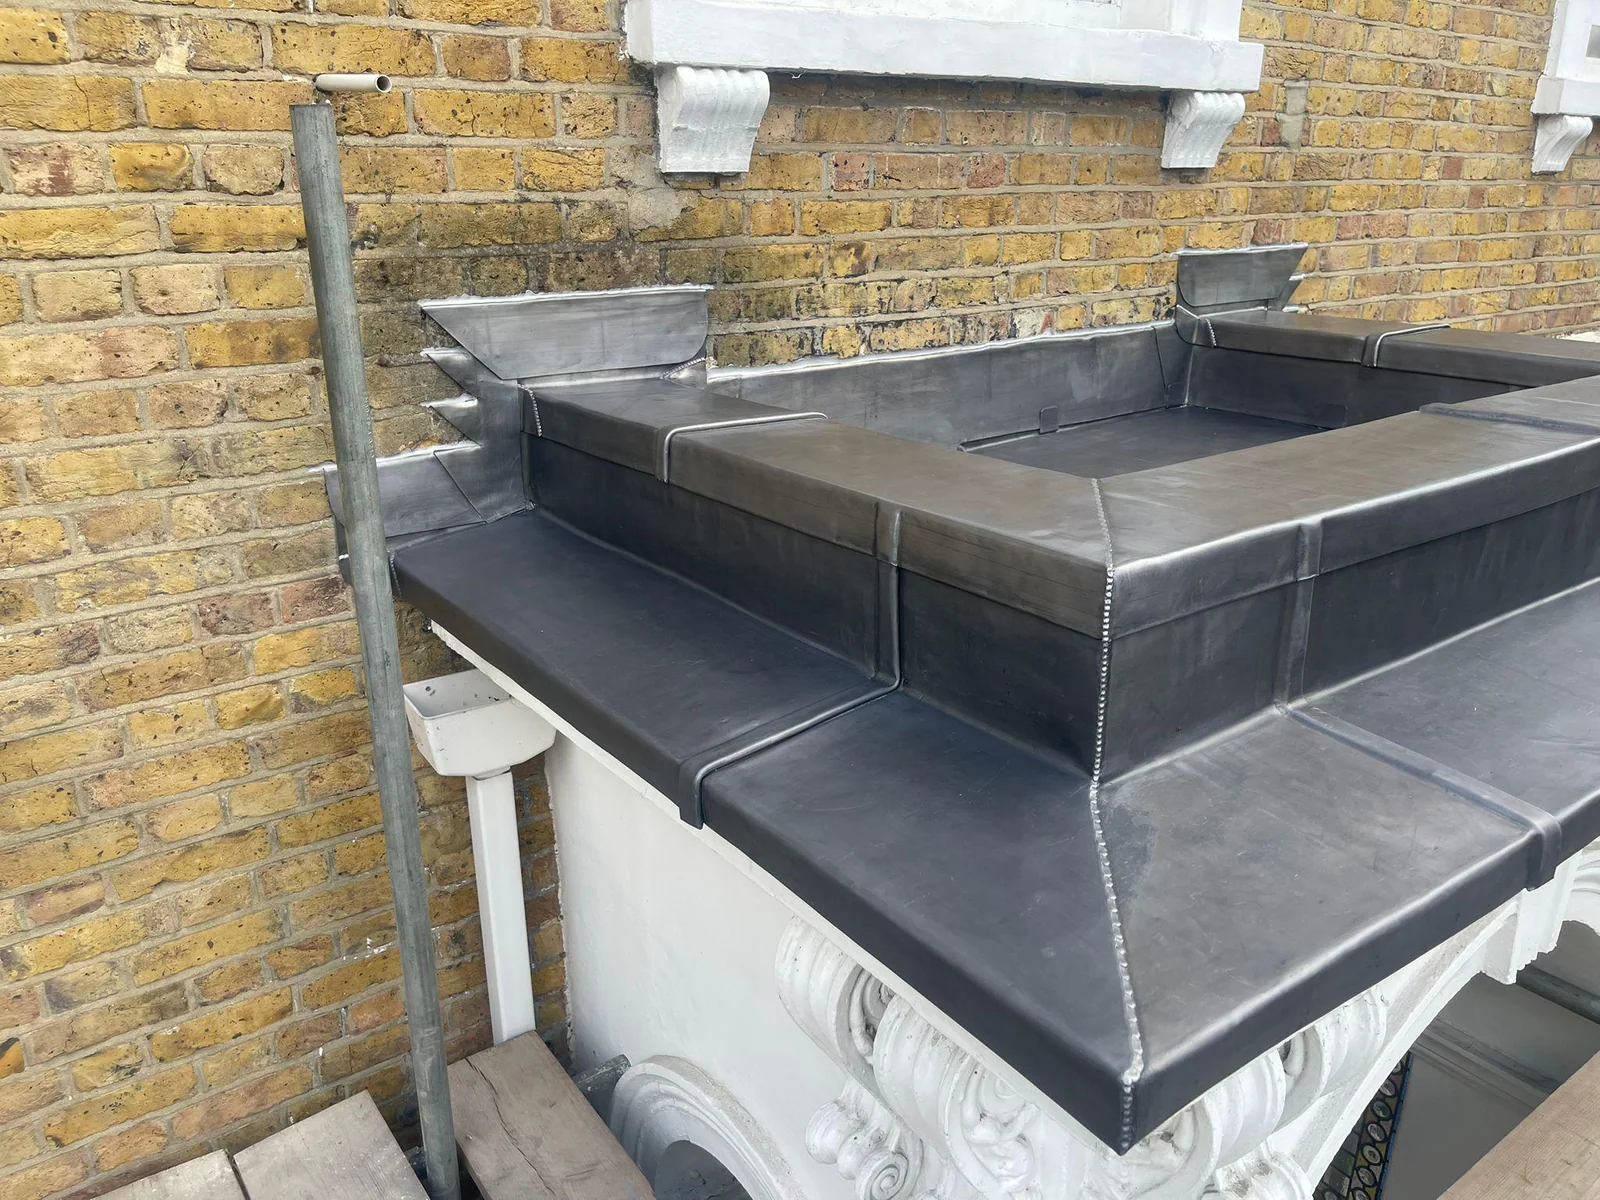
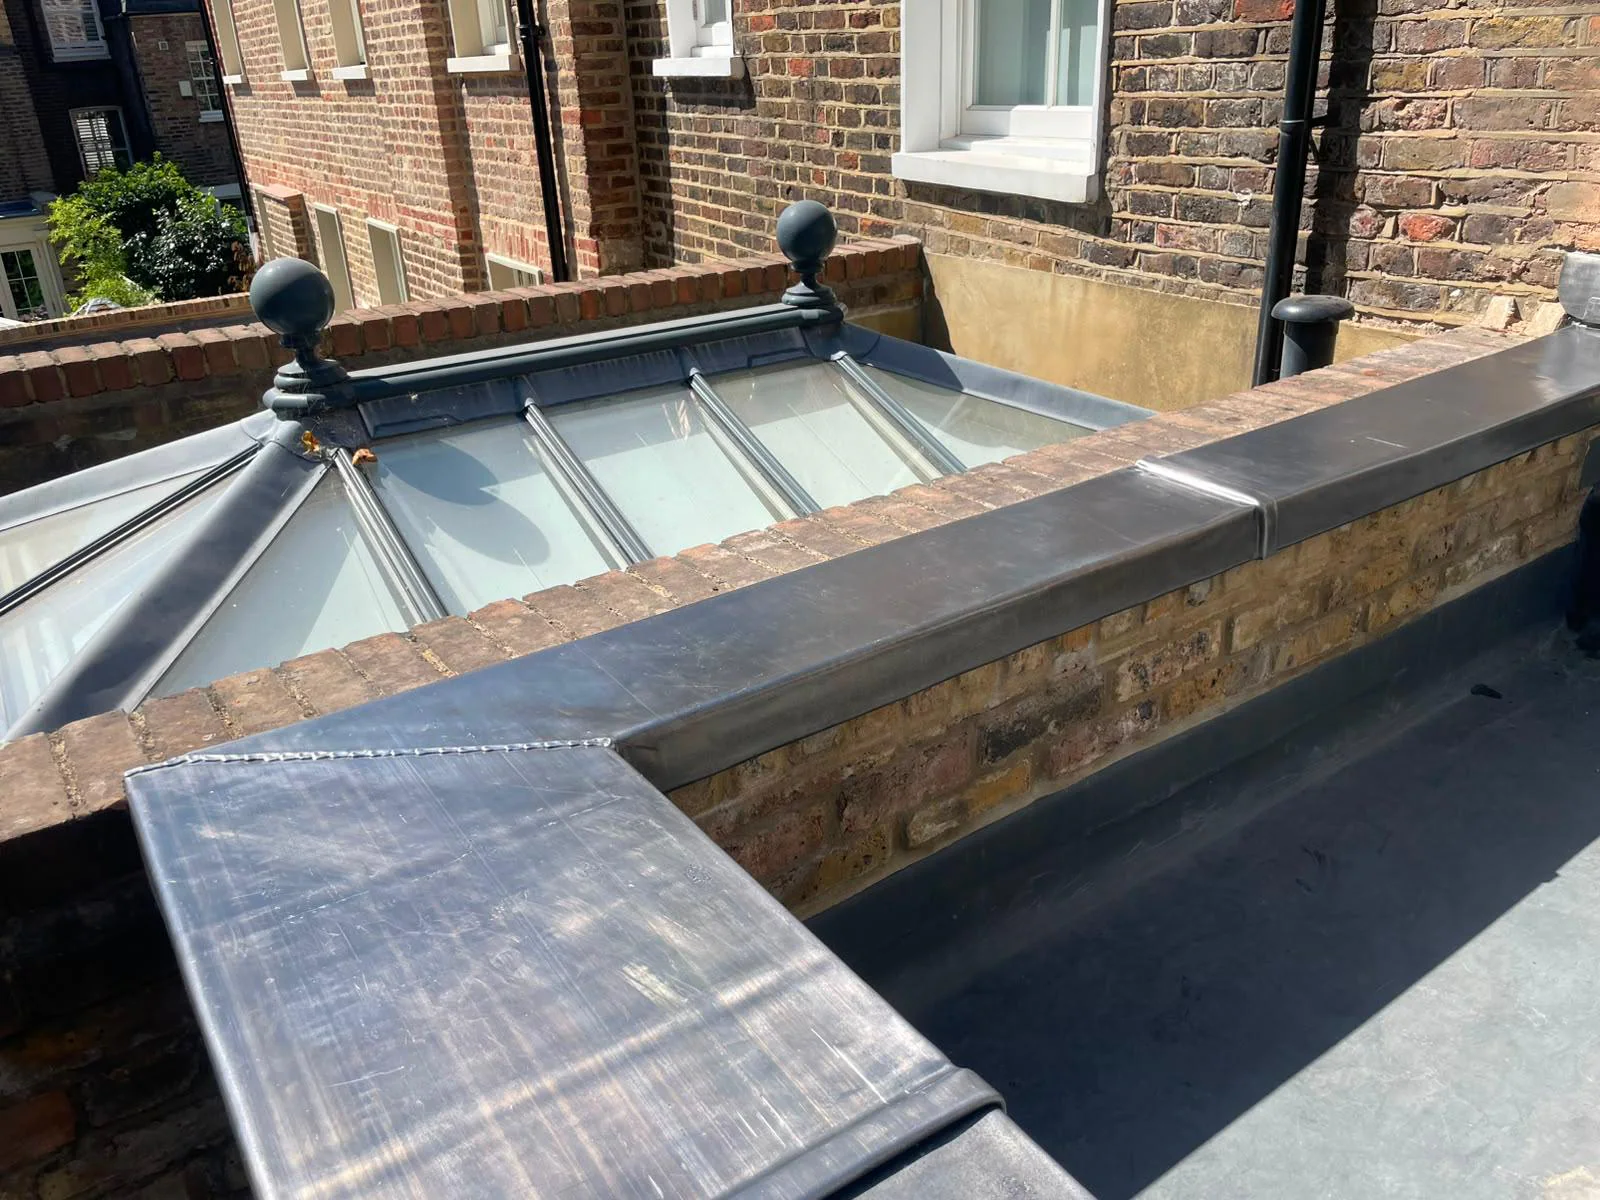
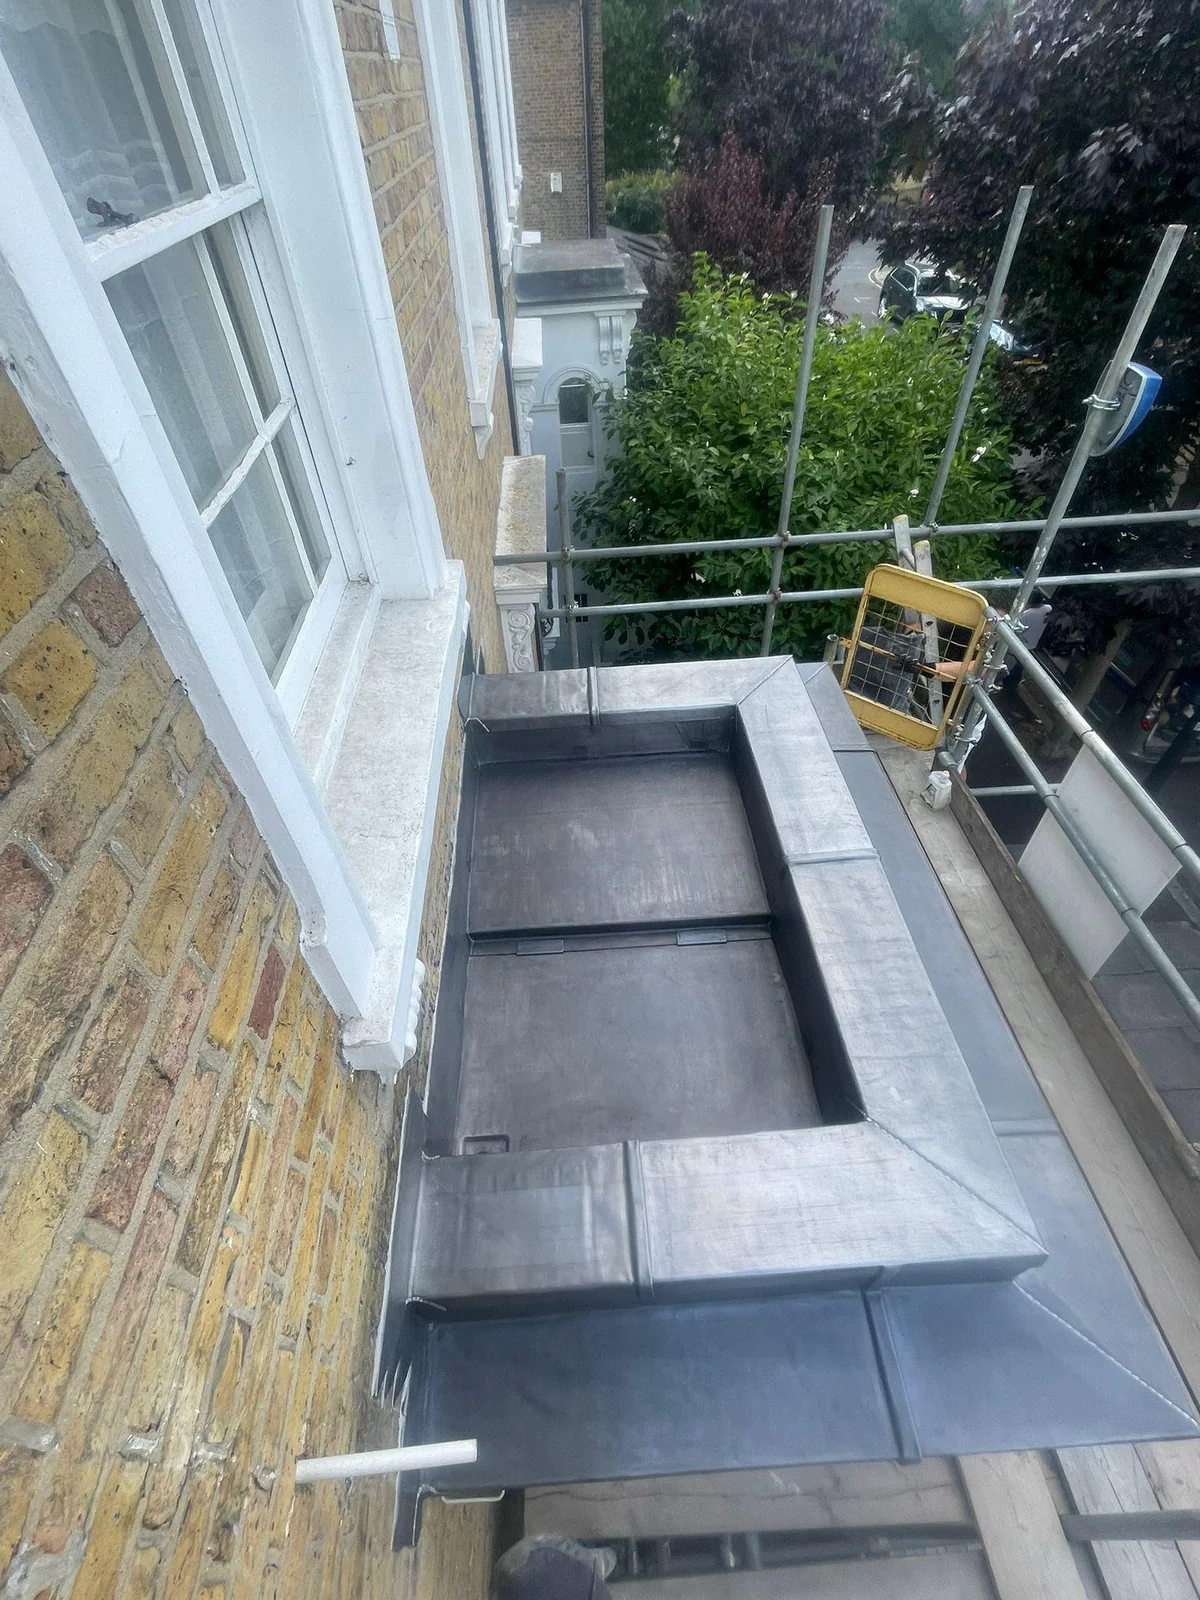
The capping was formed over the top of the parapet so rainfall would meet the lead before reaching the masonry below. The purpose of the detail is simple: intercept water at the most exposed surface and direct it away from the wall head.
Lead remains particularly useful for this type of repair because it can be shaped to existing roof geometry and detailed around changes in level or adjoining construction without introducing a rigid prefabricated profile that may not suit the building.
Welded leadwork
Welded joints maintained the continuity of the new weathering detail
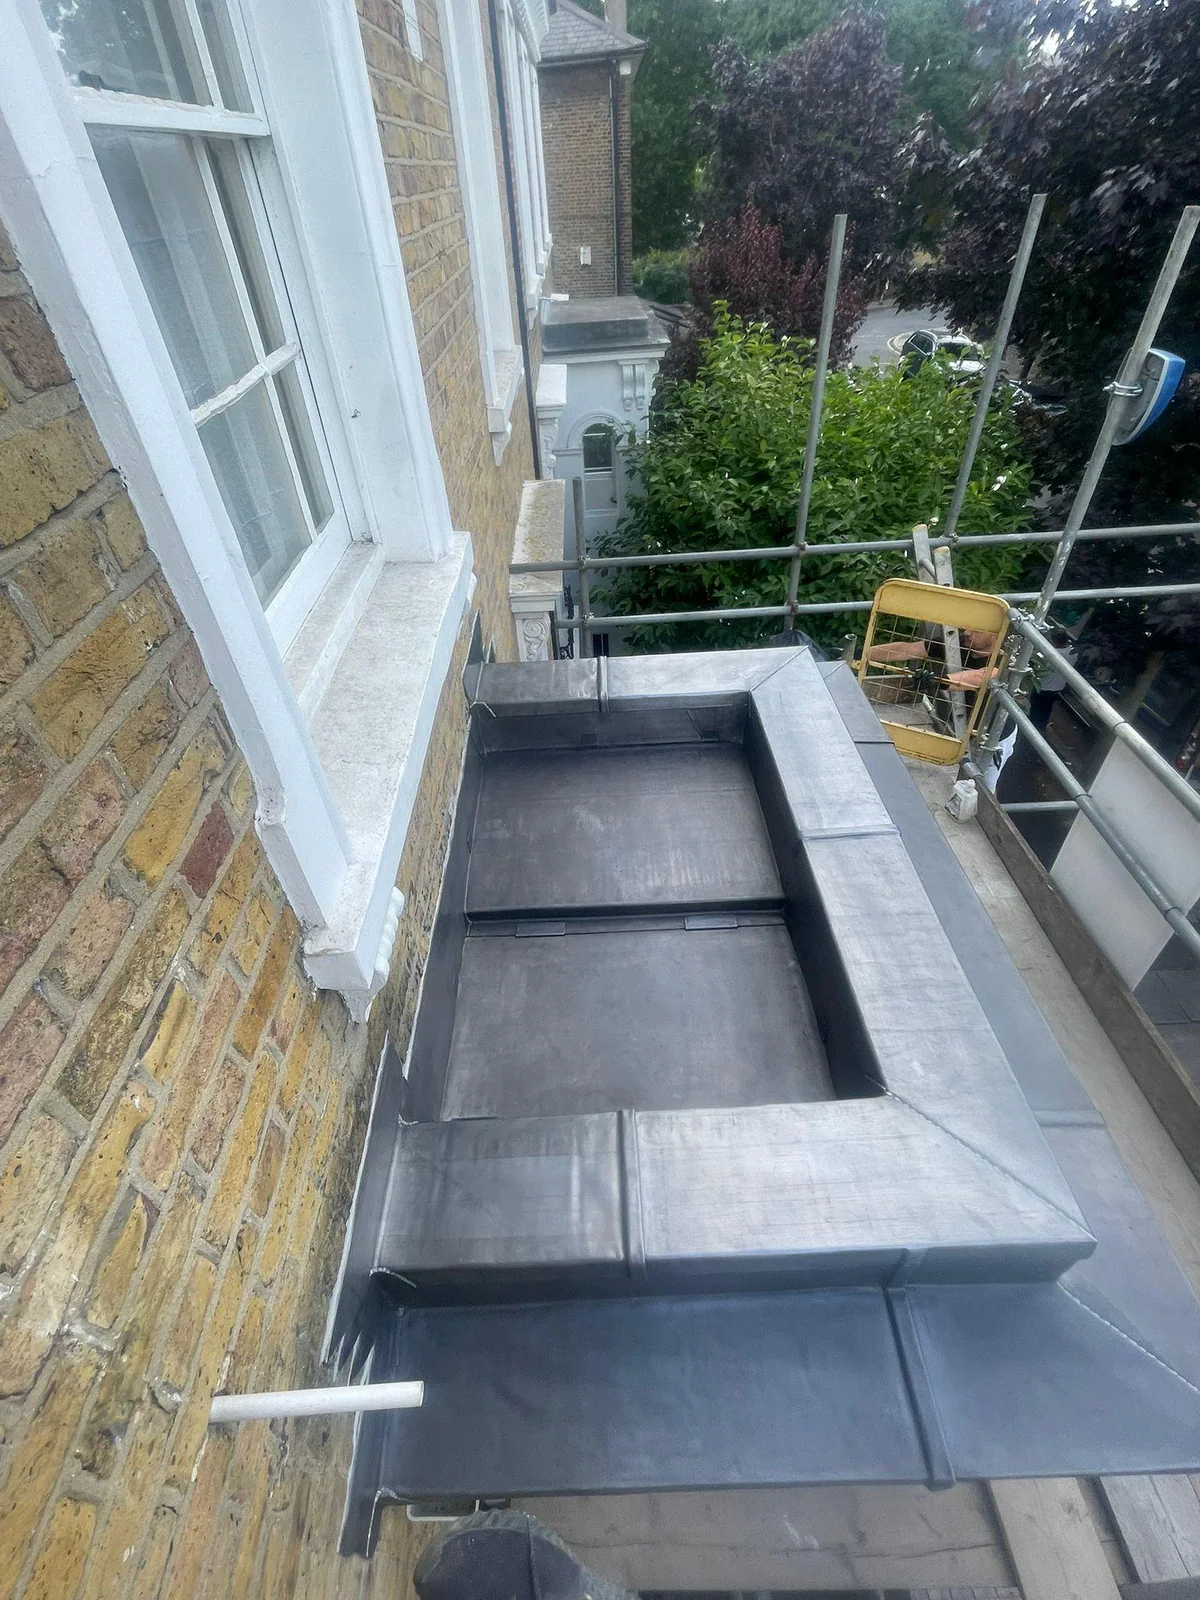
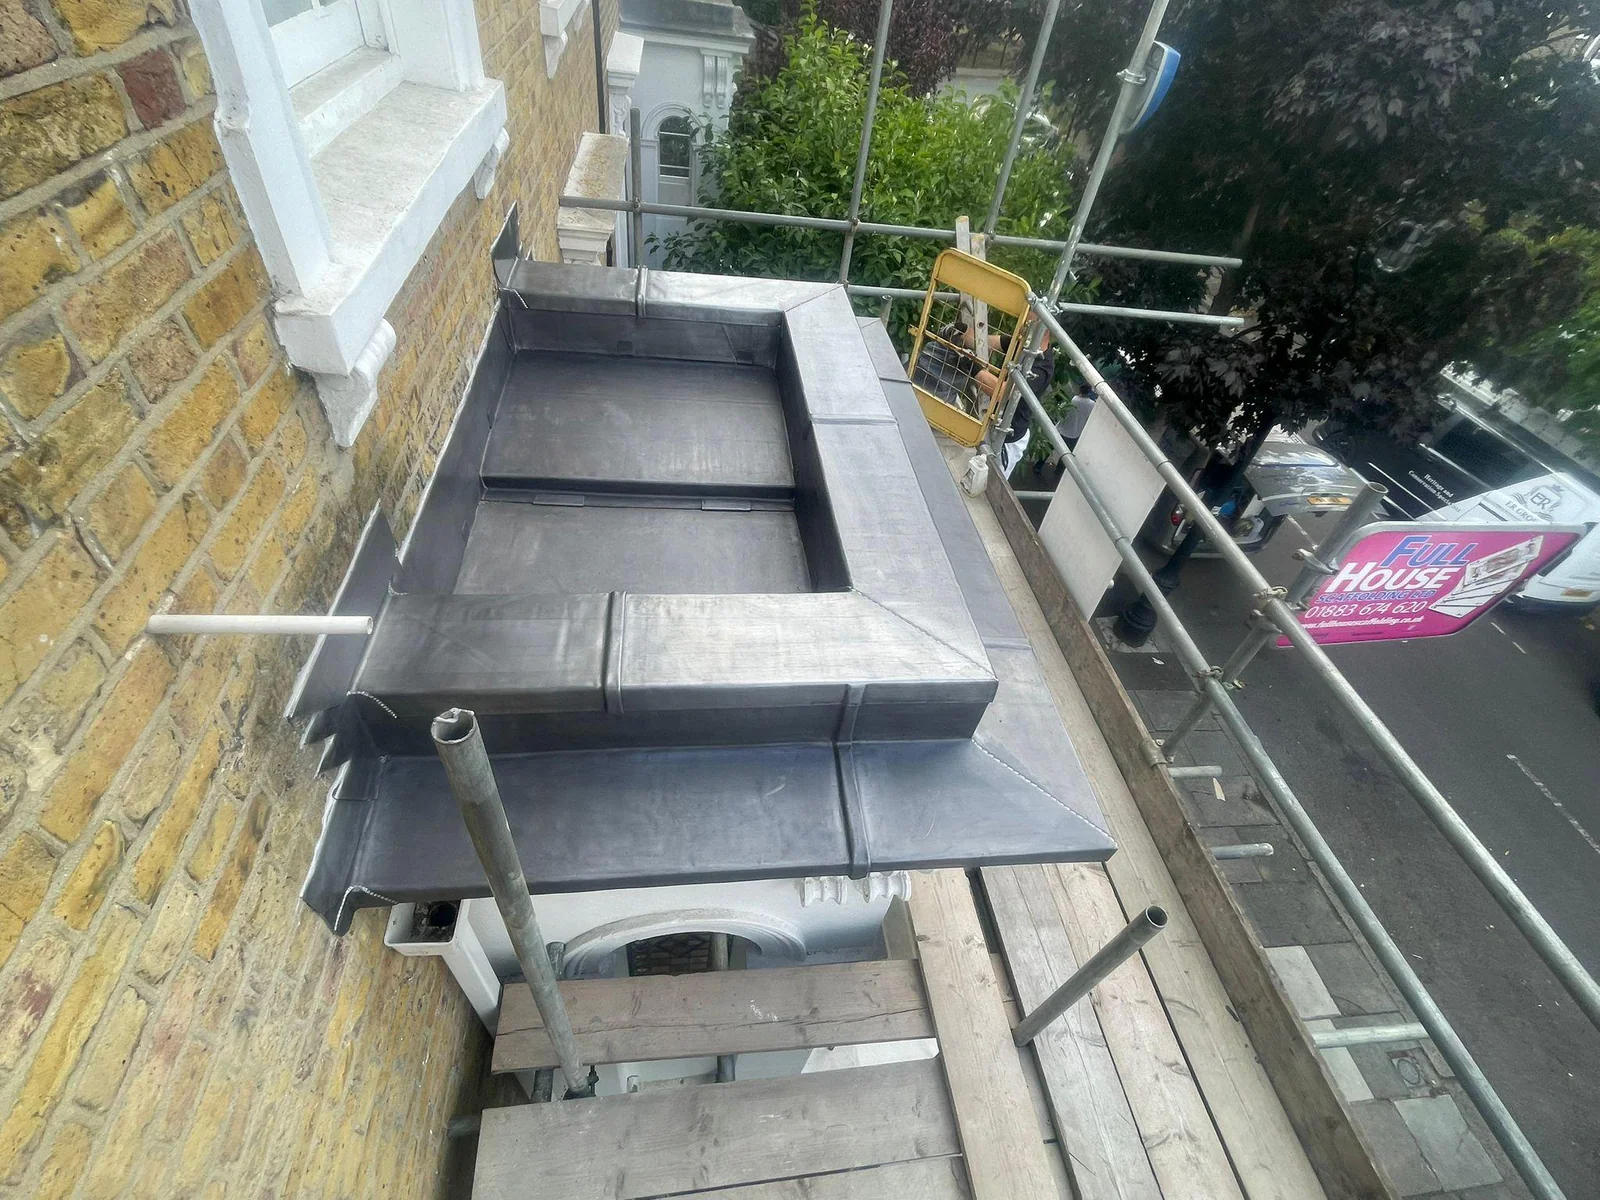
The Code 5 capping was completed with lead-welded joints. Lead welding allows separate pieces of sheet to be joined while maintaining a formed weathering detail across corners and junctions where a simple loose lap may not provide the geometry required.
Welding is a specialist leadworking skill. The Lead Sheet Training Academy identifies both welding and bossing as core methods used by leadworkers, and its intermediate training specifically includes welded weatherings and parapet-capping details.
A welded detail still has to respect the way lead behaves outdoors. Rolled lead expands and contracts as temperatures change, so sheet sizes, restraints and movement provisions need to be planned as part of the overall capping rather than locking a long run of lead rigidly to the substrate.
Leadwork standards
The detail has to shed water, stay secure and still allow the lead to move
The current British code of practice for fully supported rolled-lead roof and wall coverings is BS 6915:2001+A1:2014, used with rolled lead sheet manufactured to BS EN 12588. Those standards underpin the same practical principles that matter on a residential parapet repair.
Shed water clear
The capping should protect the wall head and direct rain away from vulnerable masonry and joints rather than allowing it to track back underneath.
Allow movement
Lead naturally moves with temperature. The sheet layout and joint strategy therefore need to accommodate expansion and contraction without concentrating stress.
Resist wind uplift
Exposed roof-edge leadwork must be secured appropriately while avoiding rigid restraint that prevents the sheet from moving as designed.
Finish junctions cleanly
Corners, welded joints and adjoining flashings need to remain part of one continuous weathering strategy rather than becoming isolated weak points.
Kensington W8 context
A traditional material suited to the roofscape of period Kensington
Kensington W8 contains a dense concentration of Victorian and Edwardian residential architecture, with parapets, party-wall upstands, chimneys and concealed roof junctions forming a familiar part of the roofscape. Across the wider Royal Borough, conservation areas and listed buildings make material choice and visible roof detailing particularly important.
Lead is well suited to that context because it is both technically adaptable and visually restrained. A correctly formed capping can protect a vulnerable wall head without introducing a bulky modern profile at one of the most visible edges of a traditional property.
This was a targeted leak repair to a private W8 home. The work focused on the parapet defect itself: trace the water route, weather the exposed wall head and finish the leadwork cleanly against the existing building.
Signs a parapet may need investigation
- Damp appearing below or beside a parapet wall.
- Moisture that worsens after wind-driven rain.
- Cracked or open joints to coping stones or wall-head finishes.
- Staining or persistent wet masonry at roof level.
- Previous patch repairs that have not stopped the internal leak.
Repair sequence
Diagnose the leak, protect the wall head, then check the completed weathering
Although this was a focused repair rather than a whole-roof replacement, the same principle applies as on larger roofing work: the scope should follow the defect and each stage should support the next.
01
Trace the ingress
Establish that rainwater is entering through the parapet wall rather than assuming the adjacent roof covering is responsible.
02
Prepare the parapet
Review the wall head and adjoining details so the new lead can be set out over a suitable, continuous support.
03
Form and weld
Install the Code 5 capping and complete the welded joints required to maintain the weathering across the parapet detail.
04
Check the finish
Confirm the completed capping sheds water away from the wall head and ties cleanly into the adjoining roof-level details.
The result
The parapet was capped in Code 5 lead and the leak stopped
Once the source of the ingress had been traced to the parapet wall, the repair could be kept focused on the detail that was actually failing. ER Group formed a new Code 5 lead-sheet capping over the wall and completed the necessary joints by lead welding.
The new capping created a dedicated weathering layer over the exposed masonry and stopped rainwater following the previous route through the wall into the house. The homeowner no longer has the leak.
Project imagery
Kensington parapet leadwork repair